Wednesday, December 28, 2005

Jumping off the Art Garage roof


So, here I go again. This time its an art journal round robin. I have been shopping for blank journals all over the place. The ones at the bookstore already had beautiful covers and they were mostly lined (yuck) and of rather flimsey paper. At the art supply store they were mostly ugly spiral bound things with only sketch-weight paper.

I thought of making one of water-color paper, but I was thwarted again. The art supply store only carried Arches papers which I've been told have very short grain fibers and they crack when folded. Then, at the rubber-stamp store, way back in the corner of the rubber stamp store were book making supplies!

So I have made a small format (3" X 5") accordion pleated, reversible journal. Side one is titled "Secret Lives of Women". The flip side is "What Men Forgot". I hope a few people use the space and do an entry on each side. I used the first spread for instructions and then a collage on the next.


Thursday, December 15, 2005

....the devil's workshop


Now that the altered book project has finished and the art journal project hasn't begun, I've had the old "idle hands" problem. While cleaning up my work space I realized that I've accumulated a lot of small collage scraps which tend to get swallowed up in my bigger scrap bin. I've tried saving them in plastic page protectors and in little boxes - but both have been unsatisfactory.

Then this week, several serendipitous things happened. First, I found that someone had given me tiny scraps stored in a CD envelope. Then my husband was tossing his old PC gamer demo disks - and they had very sturdy cardstock envelopes - so I kept them. Then I got an email offering an Art Journal retreat from a teacher whose workshops I've always enjoyed. Finally, a collegue at my Fiber Arts Guild gave me all her back issues of Somerset Studio.

I saw right away that the CD envelopes would be a super way to file all those scraps, so I gessoed a handful. I was wondering how to manage them as a filing system when I ran across an article in one of the old Somersets I was reading about a tag book. Light dawned and I saw how I could make a book of the envelopes. So I glazed and collaged for two days and today I put it all together! Now I'll be able to take a collection of small scraps with me to the retreat. And it looks good too!

Friday, December 9, 2005

Photo Finish

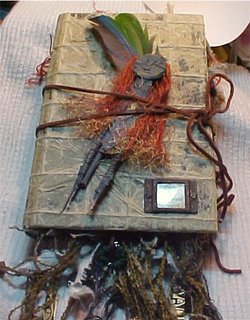
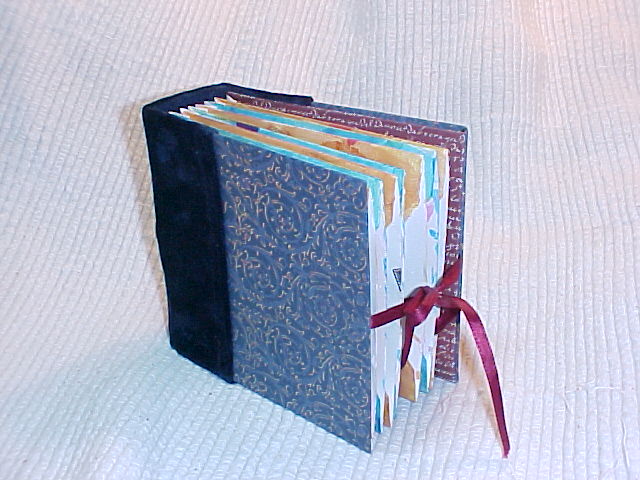
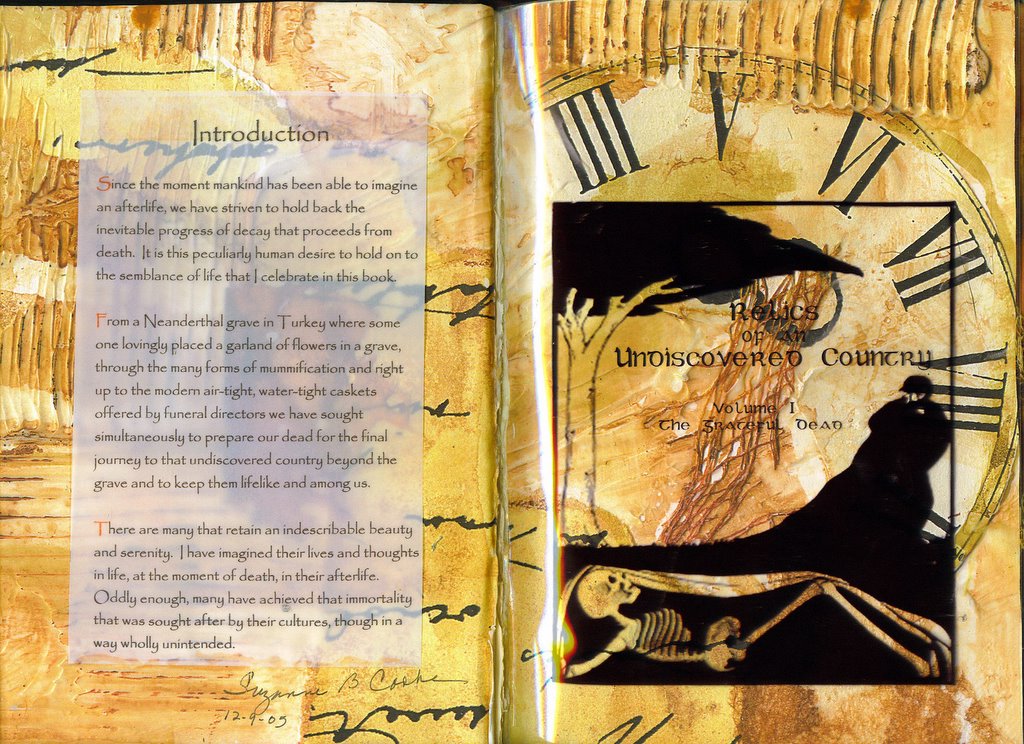
Today I finished the book! The final title is: "Relics of an Undiscovered Country Vol. I: The Grateful Dead." Not that there is a Vol II- it just sounded neat.

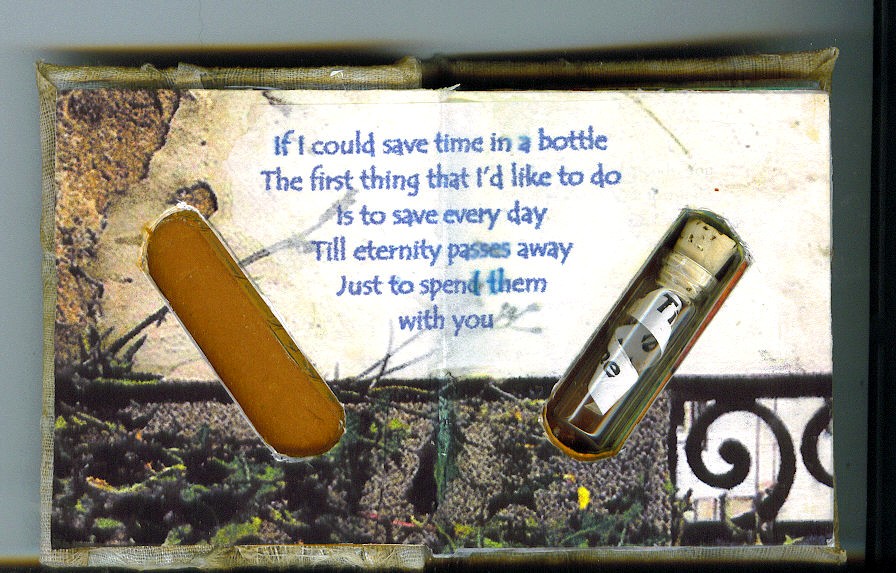
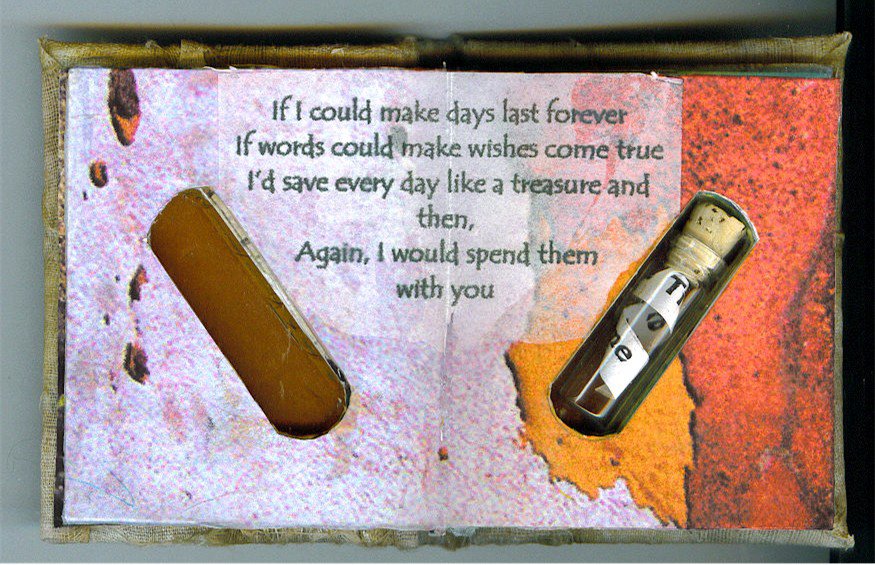
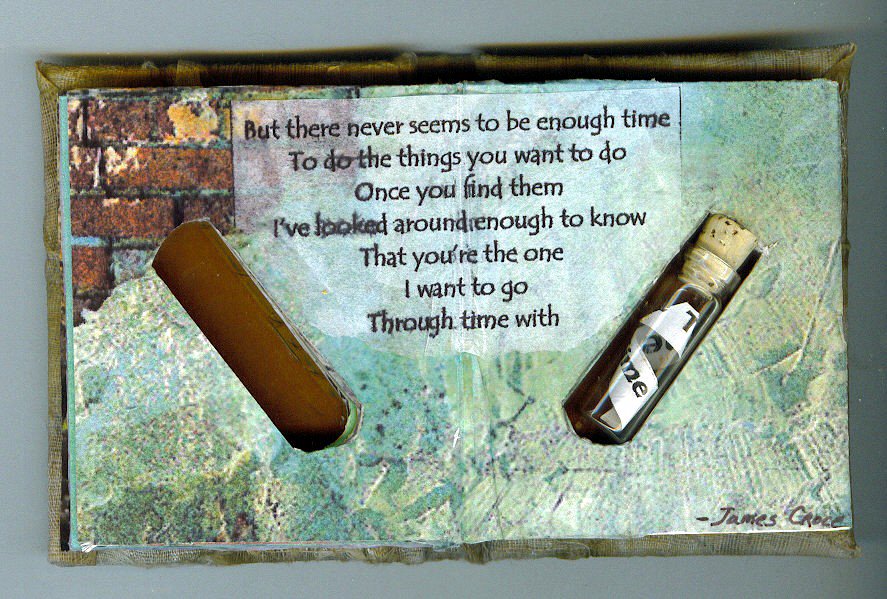
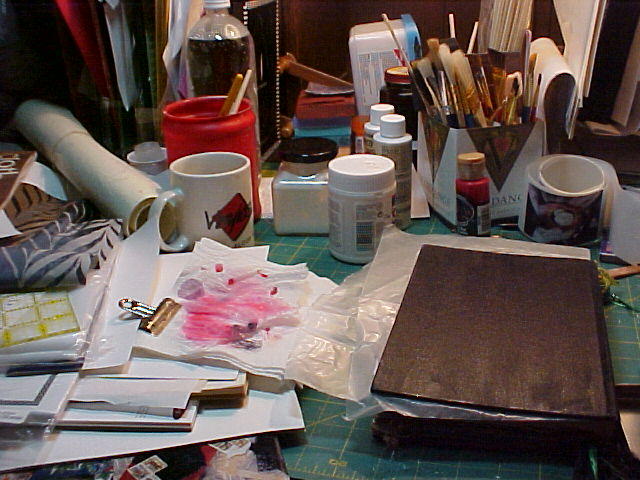
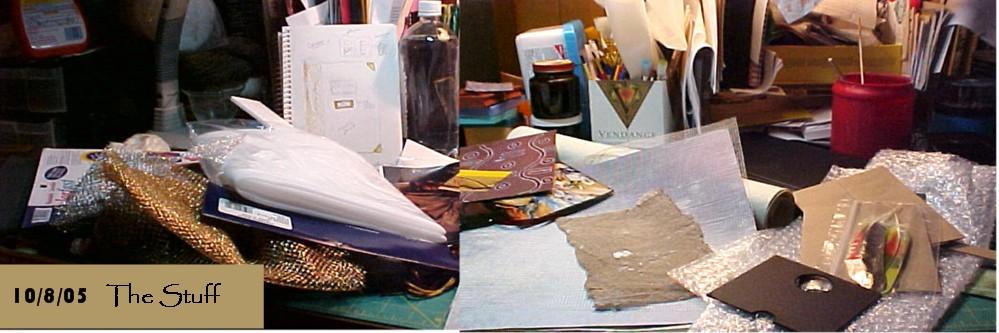
The *&^%bleepin#$@ adhesives still don't want to dry...each in its own way. The "permanent" gluestick lasts about 3 days before evaporating into the air or something. I had used it to glue pages together, at the end, a lot of the pages were coming apart, so I had to force glue into the open parts...not fun. Acrylic medium feels dry but sticks to opposite pages also glazed in acrylic no matter how long its been since I glazed them...the stuff never dries completely. Sobo glue doesn't act like glue. Nothing sticks for 5 or 10 minutes - then bingo - it works.

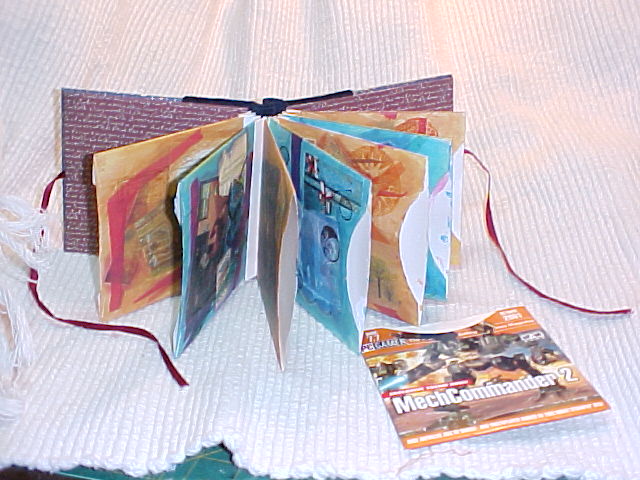
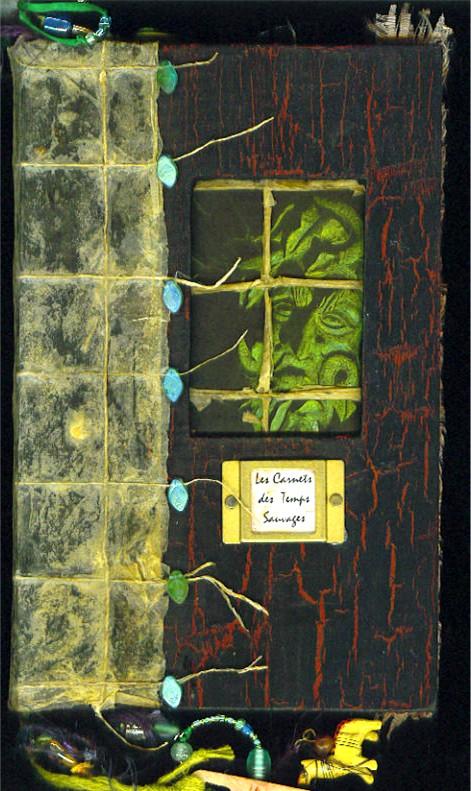
So - the cover of the book is done in "oil paper" with a linen thread grid. This paper is very crisp and crackly so I wetted it (brushed water onto both sides) to make it more pliable. This worked great for actually wrapping the cover onto the book. Once it dries, it is crackly again and tends to tear at stress points. This is an OK look for a Decay theme, but not so good for the book. I experimented, and found that hand moisturizer lotion keeps the paper pretty supple and less likely to break.

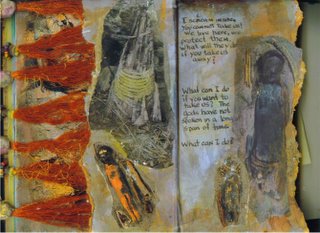
The cover art is a rendition of a Peruvian mud-mummy with macaw feathers and false hair made from silk ravellings. The doll is made from sticks and linen twine and paper-clay painted over with a tinted gesso. 
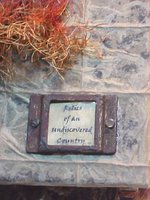
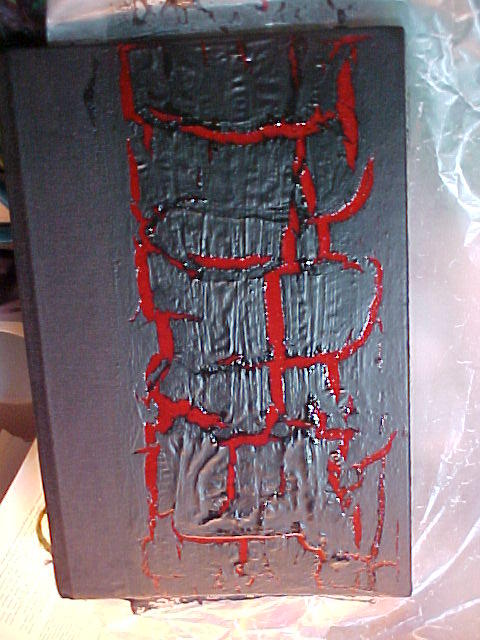
The title frame mount is treated with rusting agent. I had to tie the book shut because I have many dimensional elements that I didn't plan ahead for. That is the drawback of pre-glueing all the pages.

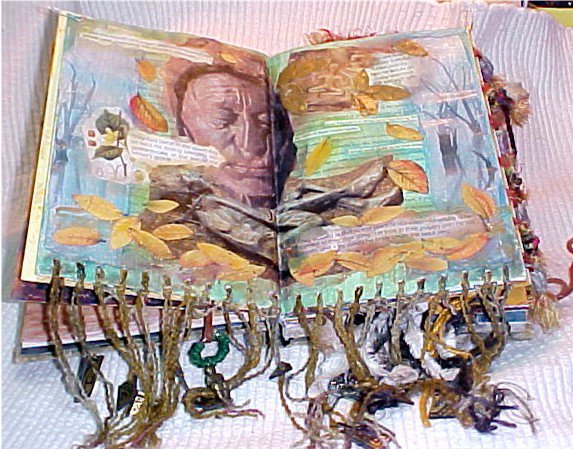
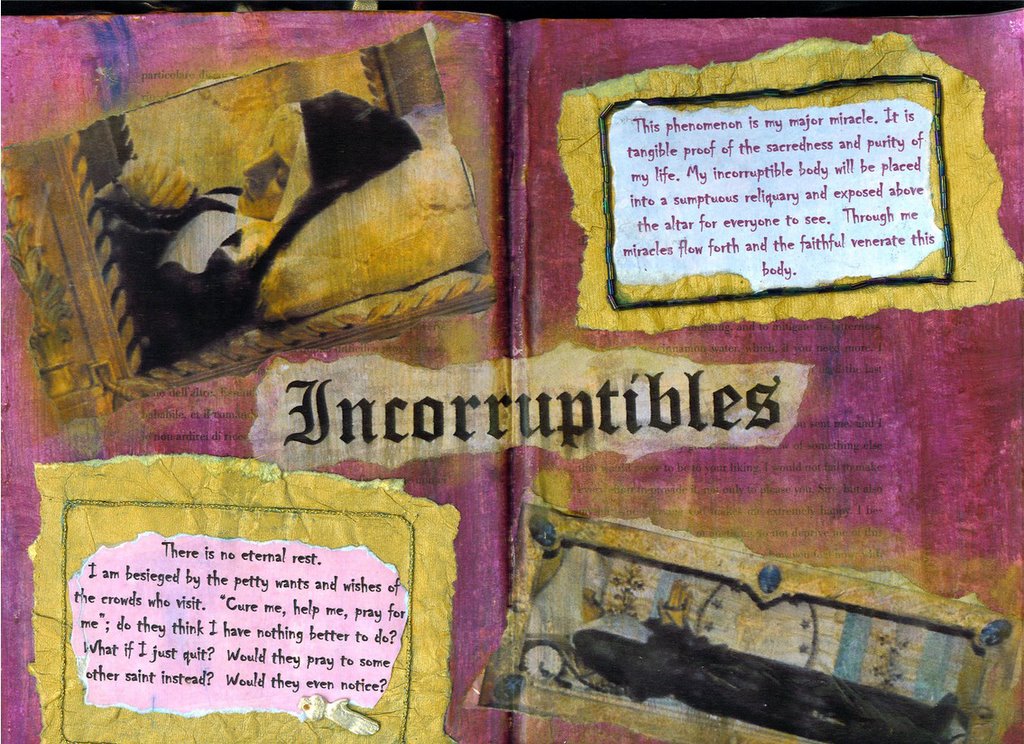
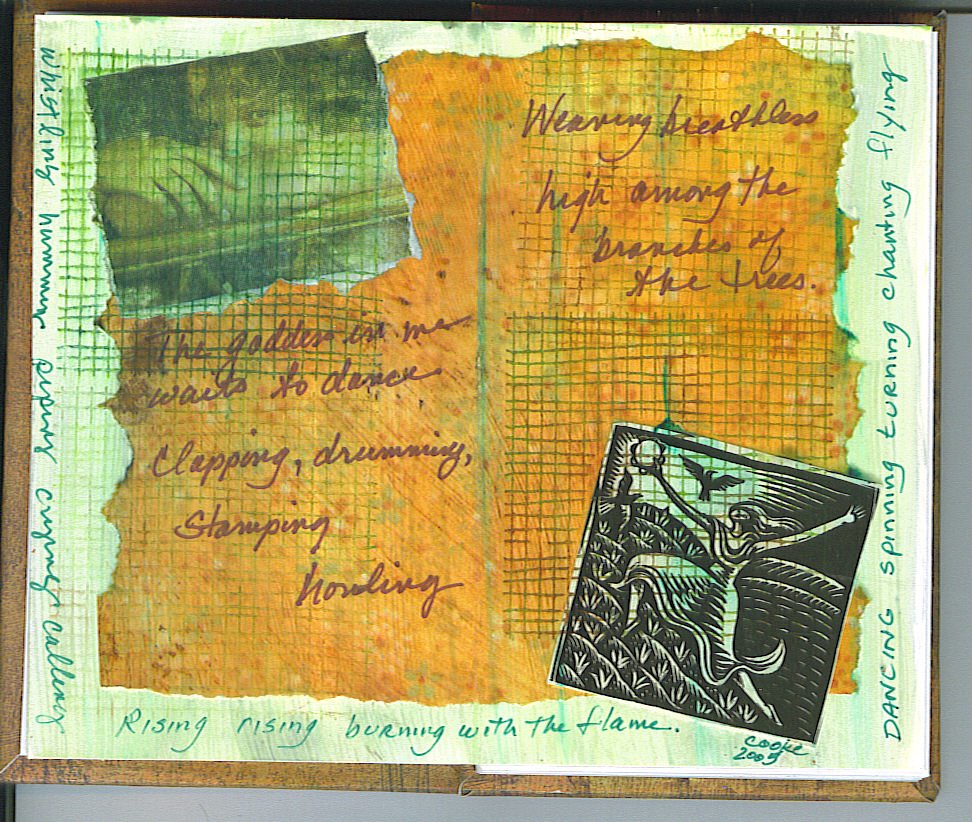
I've updated a couple of spreads...fixed Incorruptibles to cov
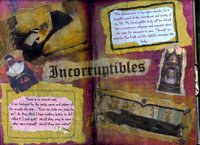
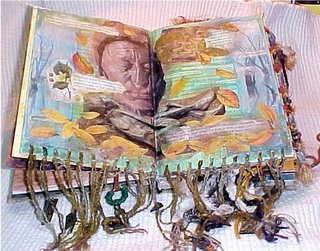
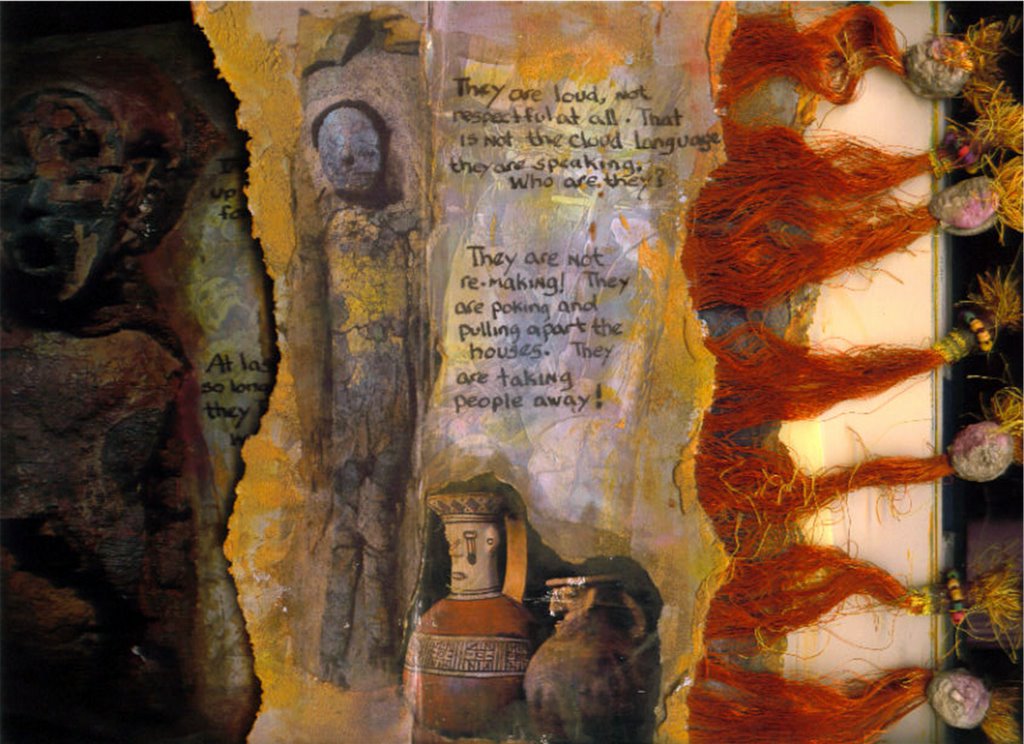
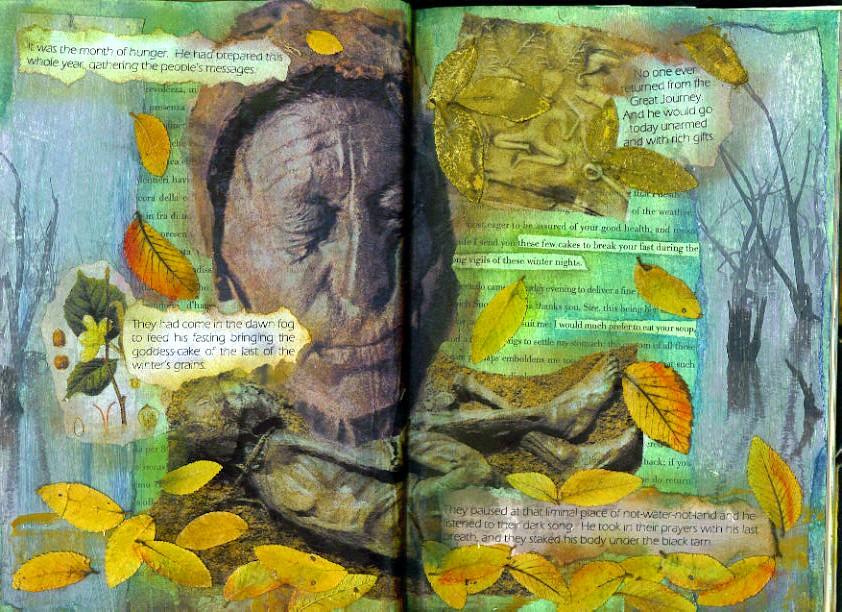
er the blemishes from it sticking together . I also added the weedy fringe to the Bog Man spread.

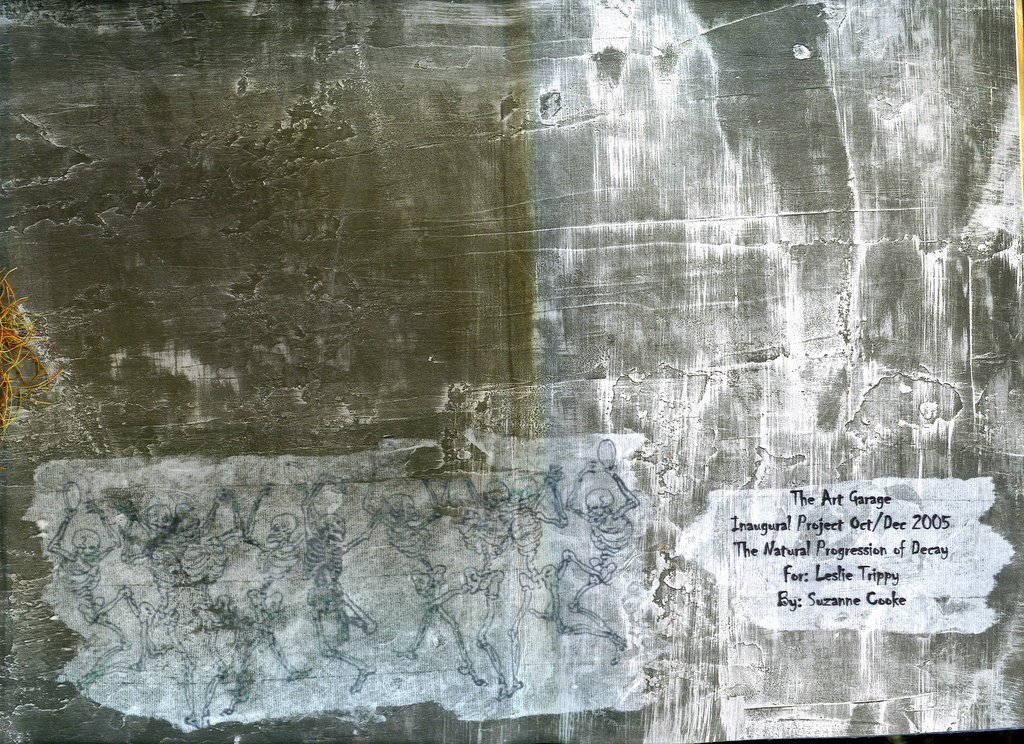
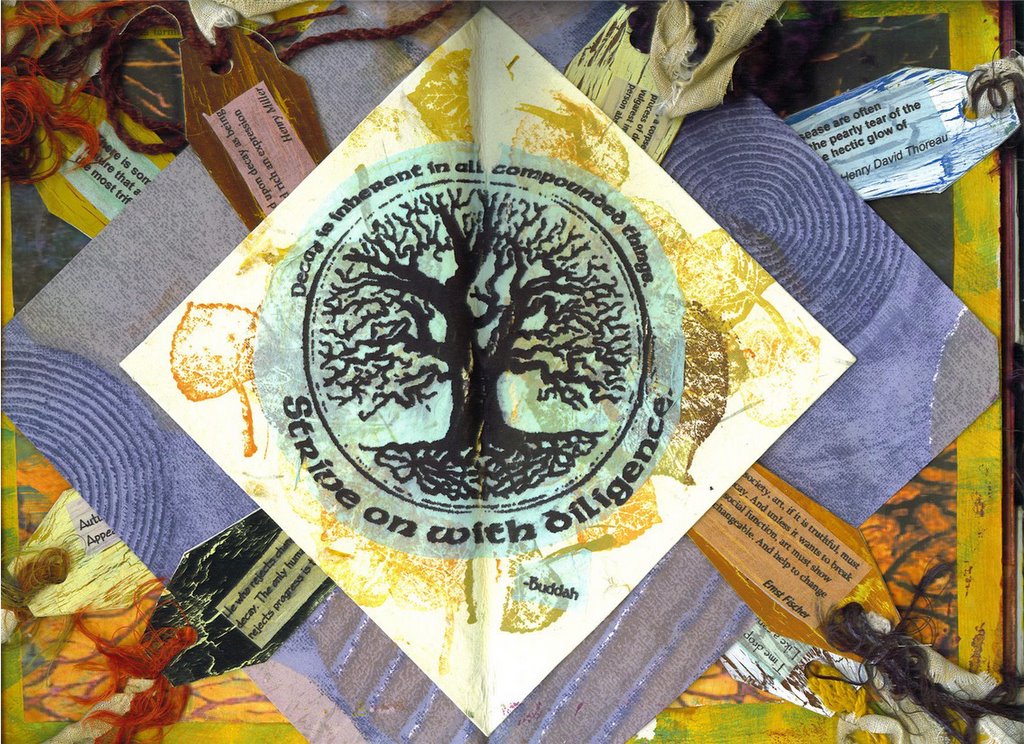
The inside front cover spread was a particular problem. Putting a spread here is just not my style. I prefer an endpaper that loosely keeps to the theme of the book. So I was very minimalist in this space. I found a paper that looked like distressed and dirty paint and simply added the group and project name with dates and who the recipient is. 
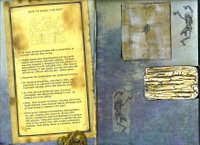
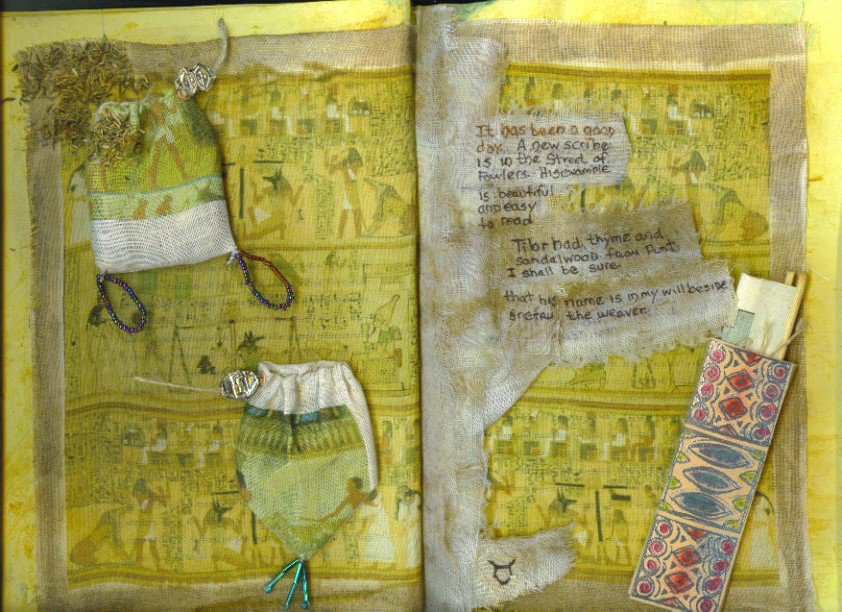
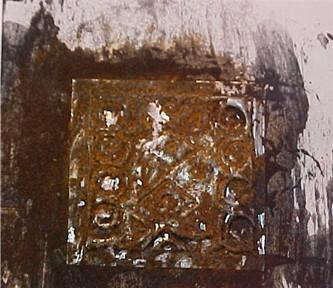
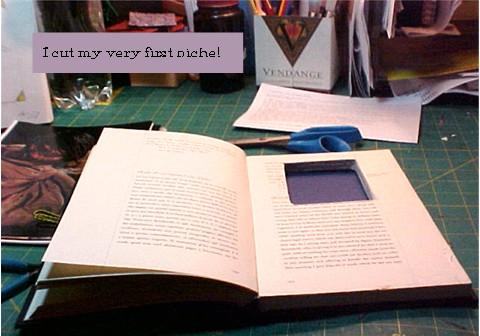
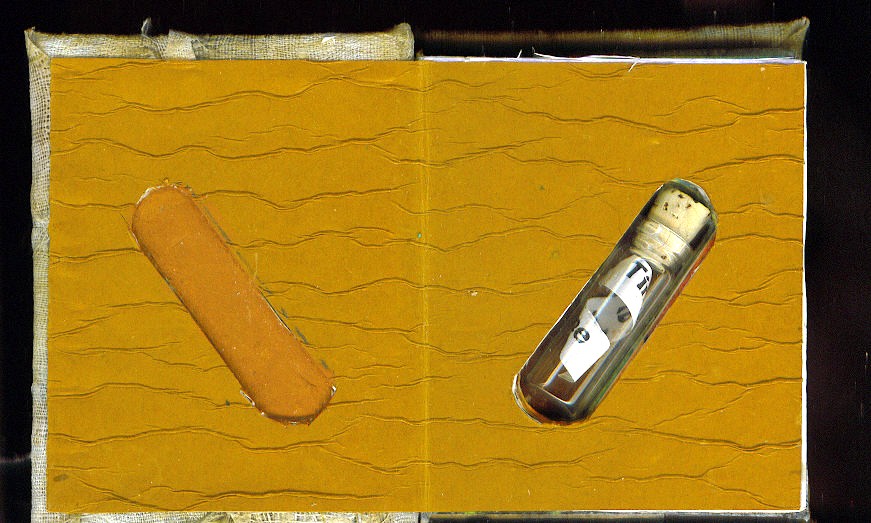
The inside back cover hold the niche, but has a facing page. which I used as a sort of recap - "How to make a Mummy". The distressed box is decorated with crackle medium over rust. It contains rose petals, myrrh and a pewter scarab pendant.

Last - my artists statement. Sigh - this gave me a lot of trouble. Various renditions were too stuffy, too casual, too pedantic. I can't say that I thrilled with the final version, but at least it sounds more like ME. I like the title page a lot. I played around with parchment and tissue and white and colored papers, finally deciding on a transparancy.

I am so not wanting to give this book away! It is probably the best art I've done. My plan is to make a PowerPoint slideshow of the pictures. I still need to make sure that I've saved all the narratives. Then its goodbye and I wait for my exchange to arrive.

Thursday, December 8, 2005

Moving towards the finish line

I've been putting the finishing touches on. I had to outline the last 10 steps because I got bogged down on which steps were dependant on others being done. This end-game has been more like an engineering project than art. The glue and acrylic medium drying is still a big annoyance. I had another spread stick together - at least it was the Incorruptibles page which I wanted to add to anyway.

I was very glad for the extension to the 15th. I spent my extra time mostly in bed feeling very crappy and achy. We thought it was the flu until the newspaper described a more virilent than usual cedar-fever season. Cedar-fever works like hay-fever but is tied to the winter blooming of some invasive juniper tree that is called "cedar" here in Texas.

There will be pictures soon.

Wednesday, November 30, 2005

Filling the Niche

I was so surprised when I saw Sharon's tiny book on her web site, cause this is what I have done to put into the niche. Great minds definately think alike! This tiny book is 3.25 X 2.75 inches. In keeping with my theme, I made the cover from distressed and dyed strips if linen. The strips were woven and them painted with acrylic medium to make them durable. Then the cover was cut from this sheet.

I had gessoed and covered the book in the first week, but couldn't come up with an inside. After I came back from my brother's funeral, it just seemed to flow. Each of the 4 2-page spread is a close-up photo of a degrading surface. I added a verse from Jim Croce's song "Time in a Bottle" to each page and then carefully cut the holes in each page to allow the little bottle to show through. Inside the bottle is the word "TIME" repeated on a curled paper. (More photos at the group's photo album)

Orphaned Spreads

These two spreads have been semi-finished for a while, but awaiting finalization.

Pocket Page: The layering on this page creates 2 sets of pockets in each quadrant. I am a great fan of quotations so the tags have quotes on decay and art. It took a long time to find just the right tree-of-life for the center. I made the tags in the shape of 19th century coffins and used the crackle medium to "age" them.

They were way too time consuming. I would have liked to have more tags cause the pockets seem empty - maybe Leslie will make some of her own to keep these company.

Incorruptibles: This one is about all those saints bodies that don't decay - which is what helps to make them saints. I used a glazing technique from the Altered Books Workshop book. This advised using a warm-cool-warm-cool layering. I don't care for how it came out, too dark and brooding. This page also still needs some sort of "punch". To me it seems sort of dull.

Into the Home stretch 1

I've got a bunch of new stuff! Several spreads have been "in the works" waiting for this or that extra thing. I read a bit more about the inks I use and they take up to 2 weeks to permanently dry! So, I will be adding slip sheets of wax paper or tracing paper. I've been mulling over how to photograph the finished book so that all the danglies and such show up. The scans are great for page detail, but it doesn't capture the full effect of the page. Any tips on technique - especially from you photographers out there would be greatly appreciated.

Neanderthals: This spread is inspired by a neanderthal burial in Turkey that included a garland of flowers. It was so touching to know that they had a sense of an afterlife. The technique uses acrylic gel with pumice stone suspended in it. The figures were all printed on wrapping tissue. This is far thinner stuff than the tracing tissue I've used before. Tracing tissue is crisp and holds up well to adhesives. The wrapping tissue is quite delicate and sort of dissolves into the background medium. This makes it very hard to glue. The trick to it that I figured out is to only apply glue to half the item, place it, fold back the unguled portion and then apply the glue.

I am very pleased with this spread. It really captures the illusion of firelight on a cave wall.

Wednesday, November 16, 2005

The Anglo Saxon burial


One more done! I'm starting to feel December 5th bearing down on me like a locomotive. In this spread I used aluminum flashing foiled with gold to make "artifacts". That was fun but WAY too time consuming. The foiling is a lot of wait to dry, wait, wait, wait, now hurry up and get the foil on before the adhesive dries too much. I think real gold leafing would be easier.

I am also exploring pop-ups. The picture isn't great cause I wanted to catch the pop-up but my scanner bed is too narrow for a full double page and the pop-up too.

I've finally come up with a title; "The Undiscovered Country"

Thursday, November 10, 2005

Half way point!...meanwhile high in the Andes...


This was a big spread. 3 pages. My big problem is drying the acrylic medium. Even when it feels dry, I've clamped up the book only to have pages stick togther. Now I put wax paper between every page.

On this set of pages I used tinted gesso and "stucco" medium to evoke rock faces high in the mountains. The background images were done on tissue (luv that tissue) using the "fade" option in "Picture-It".

The beads on the fringe are made from cloth saturated with glue and rolled around a straw, then the little beads were sewn on. The heads are Celluclay formed with a push-mold. Who-ever told me about using baby powder for a release agent - THANKS - it worked perfectly. The hardest part was waiting for the celluclay to dry...it took DAYS. I am an impatient person, its hard to just leave it alone and not noodge with it.


The torn edges are stuccoed so that they seem like flakes of rock. The fringe is a piece of silk that's been mostly unravelled. Its glued in between sheets of the section.

Sunday, October 30, 2005

Walk like an Egyptian.....spread #2 done!


Wooo-hooo #2 is done.

This is the spread where I used the printed linen. I've included some little bags of spices (sewn shut) and a scroll case with architectural plans in it. The center tip-in continues the writings on the reverse. The ties on the bags and scroll are my own hand-spun flax cord. The brownish tinge to the border and the tip-in are a dye I mixed specifically for this - I call the color "mummy linen"

Friday, October 28, 2005

More new technique...and questions


Quite a while ago I bought a product called Bubble Jet. It's a chemical that makes ANY fabric able to accept ink-jet printing. Yesterday I tried it for the first time and I love it! The process is a bit involved; soak fabric, dry fabric, iron onto freezer paper, print, dry; but the results are great. I used some sheer cream linen. The printed fabric has no change in its hand at all and the pictures are bright and pretty crisp (I enlargd them and I think I lost resolution...my bad - not the product) The first thing my DH said was..."could you make a whole book like this?" The only down side is that you are limited by the size of paper the printer will accept. Length is usually not a problem, but none of my printers will take wider than 8.5" and they all have a mandatory border...ie will not print to the edge.

I also have been using Celluclay in some silicone push molds. This is taking just FOREVER to dry. I tried unmolding when the surface felt dry, but the cast was still wet and some of them shredded. Any suggestions? BTW - I tried my heat gun which made the mold smoke! Ewww.

Tuesday, October 25, 2005

Day...whatever....14 ?

I got back from my brother's funeral on Friday and am feeling shaky. But art is great therapy, so I just jumped in with my first spread which I finished today. My theme...tho I don't have an actual title yet...is man's efforts to hold decay at bay. Yes sir, that's mummies folks; and while it may seem morbid given my current experiences, trust me - its not. I was an anthropology major in college and it still holds a great fascination for me. I am also finding myself to be a nacent story-teller and so we find ourselves here in the Iron Age.

This page uses my current favorite technique of printing pictures on tissue paper and glazing them onto the page in layers. I then use inks to blend the edges into the background and each other. The leaves are real and yellow - but color enhanced a bit with inks and applied with incaustic to preserve and flatten them. Some of them are gilded with embossing powder. I was lucky enough to also find a few appropriate phrases on the page being altered. I think I'll not give out the story just yet since it looks like you can't read it on the picture. The page will be finished with some fiber work along the bottom edge, but that will go in at the very end with the rest of the book's embellishments so that they don't get accidently ruined as I work on other pages. Once burned - twice careful!

Here, too, is a pic of the cover of another book I finished on Saturday - where I used the crackle and this wonderful stuff called oil-paper that is crisp and translucent and has linen cords running through it. It has a window in the cover (talk about a nail-biter - I was so afraid I'd ruin it) where I used the same oil-paper but cut away the paper between the cords. That was a bit disappointing because the result looks a little like rolled up masking tape.

Wednesday, October 12, 2005

Day 3 - Trying New Stuff


I've found these two very interesting products - Crackle and Rust. Crackle is a gel you paint on between two coats of acrylic and as it dries, it shriks and cracks the top coat so the bottom shows through.


Rust is a two part thingie where coat one is acrylic paint that has iron filings in it. Coat 2 is an acid that makes the rust. Then I tried the rust on some metal tape that I embosed and stuck to a card. Even the paper got rust on it...very cool.


So I got VERY brave and added the drawer to the back under the niche. I didn't have any match boxes so I used a metal box..the bottom part of the lid that I tried out the rust on. I'll cover it with card stock so that it goes in and out. By the way - the cutouts look so neat cause I sand the cut edges with a sand block and then put acrylic gel on it just like on the page edges. Then I covered it with rice paper while the gel was wet.


Monday, October 10, 2005

Day 2 - Watching Glue Dry


This was the drudge work day. I story-boarded the book so I'd know how many spreads to glue-up. Then I started tearing out and glueing. The book has softer paper than I like so I put a piece of card stock in between the glued pages. I also glued in a few background papers.

TIP: A piece of ceramic tile (or 2) makes a wonderful weight for glued pages. Get a few for free at any floor supply store. Ask for discontinued samples.

Just one pic today cause there is nothing more boring than watching glue dry.

Sunday, October 9, 2005

Day 1


I've gathered up everything among my stash that I might use. Its a bigger pile than I thought and yet I'm sure there will be more. There's a list on scrap paper of other stuff I want. The image file on the computer has topped 5 MB.

I cut a niche at the back of the book. My first one - but ya gotta start somewhere. AND - I already know what's going into it. There might be a drawer too.

Then, around 3PM I got sticky feet...noticed how really filthy the carpet was around my work table. Procrastinated by getting out the carpet cleaner and cleaning the carpet . First I had to find the instruction manual. Looking for it used up a good 2 hrs. Finally in desparation, I looked on-line. Who knew that appliance manuals were on-line. Ain't science wonderful? Now, I am NOT a cleaner - I watch those "How clean is your house" shows to reassure myself that there are people in the world worse than me. Not many...but there are some. So this was true and desparate procrastination. carpet shampooing and making/eating/cleaning up dinner lasted me until 9:30 PM when I decided to take pictures and start the blog.